What is Vmix software ? how to work on it?
What is vMix?
vMix is a professional live video production software that enables users to produce, record, and stream live events. It offers a comprehensive suite of features for mixing, switching, and broadcasting video and audio in real-time, making it ideal for live streaming, webinars, virtual events, sports broadcasts, and more.
Key Features of vMix-
- Live Video Mixing and Switching: Switch between multiple video sources, including cameras, video files, images, and more, with a variety of transitions.
- Multi-Camera Support: Connect multiple cameras via SDI, HDMI, USB, or NDI.
- Live Streaming: Stream directly to platforms like YouTube, Facebook, Twitch, and custom RTMP servers.
- Recording: Record your production to disk in various formats and resolutions.
- Chroma Key and Virtual Sets: Use green screens and virtual sets for professional-looking productions.
- Graphics and Overlays: Add lower thirds, titles, scoreboards, and other graphics.
- Audio Mixing: Control audio levels from different sources with built-in audio mixing tools.
- NDI Support: Use NDI to send and receive video and audio over a network.
- Instant Replay: Provides instant replay functionality for live sports and events.
- Remote Guests: Integrate remote guests using vMix Call.
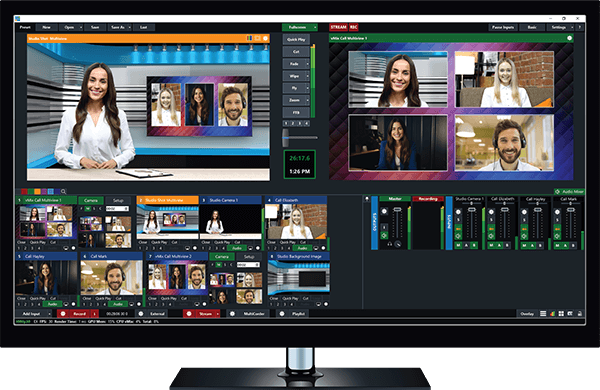
- Multiview: Combine multiple inputs into a single output for complex scenes.
How to Work on vMix
1. Download and Install vMix
- Visit the vMix website.
- Download the appropriate version for your operating system.
- Follow the installation instructions.
2. Initial Setup
- Launch vMix: Open vMix after installation.
- Choose a Template: Select a template or start with a blank project based on your needs.
3. Adding Inputs
- Add Video Inputs:
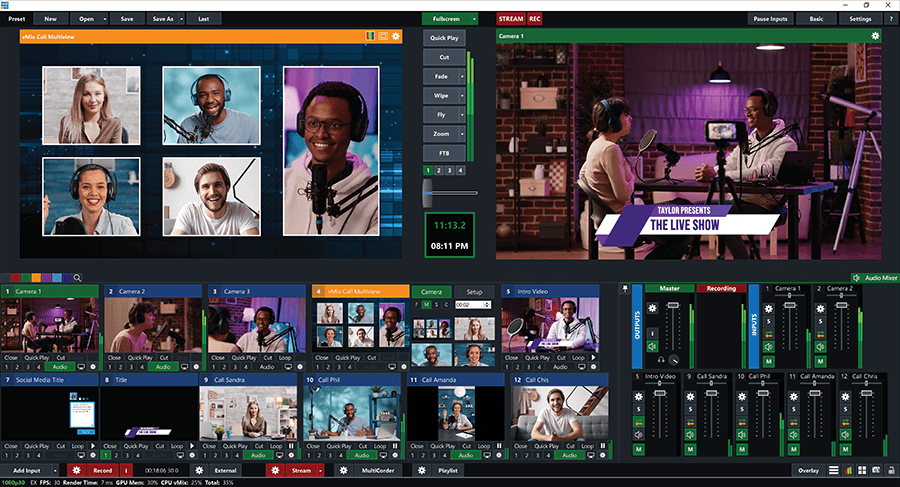
- Click the “Add Input” button in the lower left.
- Choose the type of input you want to add (e.g., Camera, Video, Image, Web Browser, etc.).
- Configure the input settings and click “OK”.
- Add Audio Inputs:
- Click “Add Input” and select “Audio Input”.
- Choose your audio device (e.g., microphone, audio interface) and configure settings.
4. Setting Up Scenes
- Create Multiple Scenes:
- Combine different inputs into scenes.
- Use Multi View to layer multiple sources.
- Use Transitions:
- Choose from various transition effects to switch between scenes smoothly.
5. Live Streaming
- Configure Streaming Settings:
- Go to “Settings” > “Stream”.
- Select your streaming destination (YouTube, Facebook, Twitch, etc.).
- Enter your stream key and other required details.
- Start Streaming:
- Click the “Stream” button in the main interface to go live.
6. Recording
- Configure Recording Settings:
- Go to “Settings” > “Recording”.
- Choose the recording format, quality, and destination.
- Start Recording:
- Click the “Record” button to start recording your production.
7. Using Overlays and Graphics
- Add Titles and Graphics:
- Click “Add Input” and select “Title/XAML”.
- Choose a template and customize the text and appearance.
- Use Overlays:
- Drag and drop overlays onto your scenes or use the overlay buttons to toggle them on/off.
8. Audio Mixing
- Adjust Audio Levels:
- Use the audio mixer in the bottom right to adjust the volume of each audio source.
- Apply audio effects like EQ, compression, and noise suppression if needed.
9. Advanced Features
- Chroma Key and Virtual Sets:
- Set up a green screen background and enable chroma keying in the input settings.
- Use virtual sets to create a professional studio look.
- vMix Call:
- Click “Add Input” and select “vMix Call”.
- Send the provided link to remote guests so they can join your production.
- Instant Replay:
- Configure instant replay settings for live sports or events.
- Use replay controls to show highlights and replays during the broadcast.
10. Scripting and Automation
- Set Up Hotkeys:
- Go to “Settings” > “Shortcuts” to configure hotkeys for quick actions.

- Go to “Settings” > “Shortcuts” to configure hotkeys for quick actions.
- Use Scripts:
- Write scripts using VB.NET or other supported languages to automate complex tasks.
Getting Started with vMix
- Experiment with Inputs: Start by adding different types of inputs and familiarize yourself with how they work.
- Practice Transitions: Use various transitions to switch between scenes and see what works best for your production.
- Test Stream: Do a test stream to ensure all settings are correct and your internet connection is stable.
- Monitor Performance: Keep an eye on CPU and GPU usage to ensure smooth operation during live production.
By following these steps and exploring vMix’s extensive features, you’ll be able to create professional live broadcasts and recordings with ease.


